The "optical-work"
Well this should be my last post for a while, as i described al the modifications up to this point. This doesn't mean the project is done, it will be driven or hibernating untill i get more time an funds to continue. What this title implies is that i did some work to "set-off" my RD from a standard one an full-fill the "vision" i had for this bike.
I want to make one thing clear, i bought this bike for the way it looked, so i wanted to exaggerate the look of the clubmansbars with the hump seat. As well as making the bike look a bit more narrow and lighter. In order to do so i had to change:
- switch to clip-ons (makes is more racy and let's the bike look narrow)
- Move the headlight down
- Make the gaugecluster fit the clip-on and headlight (the original unit is quite bulky)
- Tie in the blinkers, mirrors and switch gear
- I already had the seat changed so it fits the bottom line of the tank
- Change the side panels
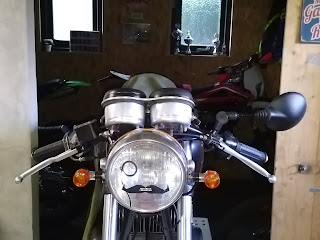
Gauge cluster
After fitting clipons, and relocating the headlight with some aluminium brackets it's obivous the original gauges sticks out like a cam-shaft on a two stroke. It's wrong. After disassembly of the gauge-cluster, i saw the possibility to "hang" a bracket on the underside of the top yoke, and in this bracket the gauges could be positioned. The joke has a little recess making room for the idiot lights and iginition key. The yoke itself was plagued by the two larges holes for the handlebarmounts, a couple of beer-caps fixed that.

Made a wooden template to fit the gauges above the lowered headlight and in center with the clip-ons.


The wood got switched out for 5mm aluminium sheet

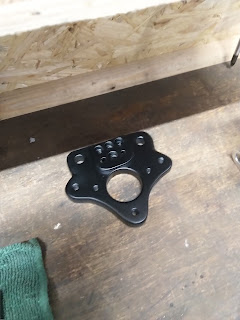
Made an mounting bracket from 12mm thick aluminium, which mounts underneath the top yoke on the original threads (from the bottom).


Also the Idot-light got added in the yoke's recess. And a couple of BLACK-POM bezels were made to even out the height difference of the gauges.


I used a piece of nylon to stretch a aluminium tube to fit over the gauges.


And Pressed the bottom caps

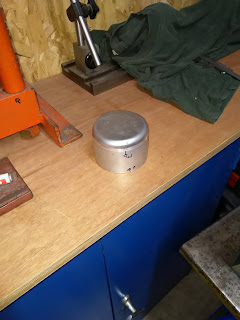

Thus creating the 2 cups for the gauges to sit in, and look "factory"

Got the cups welded up, then i made them smooth and polished them.
Got the bracket painted black

Polished the top yoke, and fitted the beer-caps

After it's finished i was so happy with the result i treated myself to a beer.
Making Glass-fiber Sidepanel copys
As i'm running pre-mix, left over from my enduro-bike the oil-pump and tank are redundant. After i removed the oil-tank and the original sidepanel it looked daft. Some kind of panel was needed, I decided to make Glass-fiber copies and add a ram-air intake for the large pod filter.
First, i made 2 woodenboxes for the side panels. Then i made a mould using (standard -wall) plaster. These moulds were revised and smoothed. In which i made the glassfiber-epoxy copies. After pulling out the copy's i smoothed them out with bondo an cut the opening for the air intake. I remade the mouns from 2mm aluminium sheet and Epoxied them in place (araldite 2030) . The panels where finished togher with the paint-job.

The OIL-tank and side panel in the wooden box, for trail fitment

I used schrink-wrap and painting-tape as loosingen agent for the plaster


casting my first plaster mould

For the oil-tank i used playdoh to make the oilfeed lines clear the mould, in a later stage this part of the mould is filled in with plaster again


The finished and coated moulds

After laying the glass-fiber


The side-panels released from the plaster


The first fit went superb

Smoothing out the out-side

Fitting and glueing the mounts and reinforcements


Adding the Fly-gauze

With decals and paint, you would not say this is a copied-oiltank.
Miscellaneous odds and ends
I produced a lot of bits and pieces just to make it fit. there's not much behind it, just keeping it tidy, racy and 70's.


First applying the black-base

Then applying the gold, which now has a black outline making it "pop"

This is a template made for the battery and electronics box.
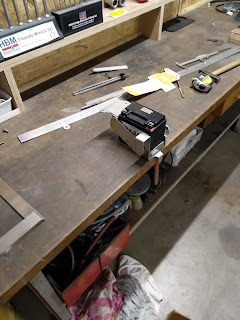

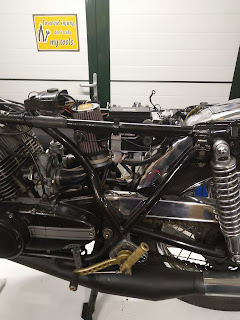
The electronics fitted nice and snugg next to the ridiculous large airfilter

I also fitted new (heidenau K65) tires, i chose them small 3.00-18 & 3.25-18 for the skinny look.

When all the parts were at the paint-shop i took the time to polish all the aluminium bits, including the switch gear.
Job-done Time to ride
After 4years of on and off building and riding, it's time to ride. For the occasion i purchased a vintage leather suit and off i went.

That's me on my first real sunday-ride i went out for 2hours, and the bike was a dream come true. Not a single misfire, and it handled so nice.

So i went out with my mates for Ice-cream.


After hibernation, i will start on:
- revising the engine
- mildly tuning the cylinders
- making a new rear-fork (a little stiffer and longer)
- Relacing the wheels with aluminum rims.
But for now, i'll just relax and enjoy my family.